Wednesday, November 30, 2005

Why We Need a Pickup Truck

Mike and I each have a car and we fully own them. The credit unions can’t lay claim to a bit of them. We plan on driving these cars until they fall apart around us. Neither of us want to start making car payments again.

As proud as we are of our generally debt-free status, I’ve found my eye lingering on other vehicles. We’ve agreed that after the demise of our current cars (in ten years or so?), we’ll purchase a hybrid car and a pickup truck. With gas prices on the decline (for now!), the hybrid need seems less urgent. The truck though still has my fancy.

When I was in high school, I told everyone that my first vehicle would be a great big black 4x4 pickup with shiny chrome bumpers and KC lights – the sort of truck so high off the ground that I’d need to carry a stepstool to get in and out. I can’t explain my fixation with this beast as anything other than penis envy. Instead, I got a Nissan Stanza wagon made of tin that was promptly smashed by none other than a great big pickup (GMC).

My new pickup fixation is less grand and certainly less Freudian. I don’t care what it looks like, as long as it gets decent gas mileage and I can haul lots of crap in it. Literally, I will be hauling poop (manure) in this truck, along with mulch, topsoil, gravel, bricks, lumber, straw, plants, and furniture. I’ve stuffed as much of this as I can in my Subaru wagon, but I’m repeatedly frustrated by the lack of cargo room. I’ve had to pass up too many garage sale treasures because I couldn’t cram them in my car. I can’t even get a sheet of plywood home!

As my home and garden projects grow grander, my need for a truck increases. I’m beginning to suspect that I won’t wait until my beloved car passes on to purchase one. It can’t hurt to keep an eye on the classifieds, right?

Tuesday, November 29, 2005

Purple Wall

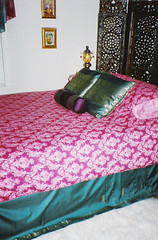
The India Room’s original color scheme was inspired by a fuchsia and peacock blue dupatha (an Indian scarf). After outfitting the room entirely in these jarring but pleasing colors, I felt like something was missing. The room needed an accent color. I introduced a purple pillow and a purple lamp. I also wanted some color on the walls, but I liked them white. The contrast of dark wood and bright colors against white walls looks very “Indian.” I was also afraid that color on the walls would clash with the window treatments and overwhelm the room. The wall behind the bed doesn’t abut any of the room’s textiles and is mostly obscured by furnishings, so it was a perfect canvas for a great wash of color. After agonizing over the shade for weeks, trying to match the purple of the pillow and lamp and yet not clash with the fuchsia and blue, I settled on an eggplant purple, bought the paint, and then abandoned the project for my gardening obsession.

After the weather had driven me indoors for the season, and I was sick of looking at that darn can of purple paint, I picked the project back up. I took the paint to Home Depot for a good shaking. (I didn’t even peek at the paint beforehand, but I assume that the heavy pigment had become well settled at the bottom of the can.) The kitties were ejected from the room (although they persisted in meowing outside and clawing at my plastic dropcloth from beneath the door) and I applied three coats of paint over the course of three nights. That was the easy part.

Because it is my nature to turn a small project into a big one, I also wanted to frame the wall with molding along the top and its two sides (the room has baseboard molding). My desired effect was for the wall to look like a “big purple picture.” This small trim project was also to be a practice session for more ambitious molding installation in the rest of the house.

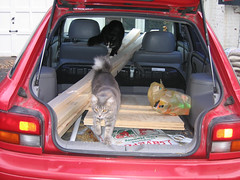
I bought a fairly simple door casing molding from Home Depot. In order to get the longest (ceiling length) piece into my car, I cut it in half. (Don’t do that. Lining up the two pieces was more pain than it would have been to tie the entire length to the roof of my Subaru.) I also bought paintable caulk, a caulk gun, finish nails (brads), a nail set, and a miter box.

I had been contemplating this molding project for months. In the early stages of planning, I realized that I needed to cut the ends of the trim at a 45 degree angle, but I was unclear as to how this was accomplished (without a compound miter saw), until I asked my buddy Rob. He directed me to buy a miter box, telling me that it was cheap and easy to use. I like cheap and easy.

Until I actually bought the box, I had no idea what it was. In my mind, I envisioned a box like the sort the Bene Gesserit use to test Paul Atreides in Dune. Instead of sticking a hand inside to experience unimaginable pain, though, one simply inserted the end of the molding, pushed a button, and retracted the perfectly mitered trim. Unfortunately, the box isn’t quite so magical; it wasn’t really a box, but more of a frame, and required me to wield a saw, but it was cheap and easy to use.

I mitered my edges and painted the trim. While the trim dried, I used my stud finder to locate and mark the studs beneath the wall. I brought the finished trim upstairs, cut it to fit, and predrilled holes that corresponded with the locations of the studs. I nailed the molding up with an obscene number of nails. (You’d think I was hanging cabinets instead of a 2 pound strip of wood.) The ceiling length was a bitch because (duh) the wall/ceiling isn’t perfectly flat or square, so it was difficult to line up the two pieces that covered the span. After ripping the left-hand piece off once, I managed to join the two pieces in a reasonably straight line.

The real magic was not the miter box, but the paintable caulk. I LOVE this stuff. After setting the nails below the surface and topping them with caulk and paint, they are absolutely invisible. My not-so-perfect mitered joints look flawless after the gaps were smeared with more caulk and paint. I’m thinking of using caulk instead of spackle to fill nail holes in the drywall before the next wall-painting project.

The end result is perfect; I have a big purple picture on one wall. It ties in nicely with the purple pillow and the purple lamp. The unrelenting glare of fuschia and peacock blue is dampened a bit. Ironically, you don’t even notice my molding masterpiece, but that was kind of the point. The wall just looks neat, clean, and finished.
Monday, November 28, 2005

Torturing Paperwhites

Like Andrea, I’ve always thought that forcing bulbs sounded like an awfully cruel thing to do to a defenseless flower. The older I get, though, the meaner I get. This holiday season, I’m sadistically torturing bulbs until they yield their flowery secrets. The Grinch has nothing on me!

I bought two packages of paperwhites and begun forcing the first batch in early October. I chose paperwhites for their scent (which I had previously only read about) and their absence of a need for a chilling period. For Thanksgiving blooms, I nestled four bulbs in a small pot filled with potting soil. I watered them and put them in a dark room.

According to the absolute font of knowledge (the internet), I should have watered the bulbs weekly until they developed root systems and began to sprout leaves (after roughly 3 weeks). At the one-week mark, I neglected to even check on the bulbs, let alone water. At the two-week mark, I happened to enter the coal cellar for another purpose and nearly shrieked at the pale green tentacles emerging from the pot. After a moment, I realized that I was not looking at a space creature, but paperwhite shoots. My horror gave way to pity for the anemic leaves. I mercifully moved them to our sunny, but cool (50 degrees), sun room.

Once in the sun room, the shoots greened up. I rotated the pot every few days to combat phototropism. I watched the pot as the leaves grew and grew and grew and grew. I had no idea that paperwhites grew so tall! (The height explains why the paperwhites decorating one of the featured homes in the November Better Homes and Gardens issue were tied up with twine. I assumed the homeowner was engaging in bondage play, when actually the plants just have a tendency to flop.)

Swollen buds eventually appeared among the thin leaves and the first flower emerged on Thanksgiving day. I eagerly sniffed the bloom and was, at first, dismayed by the strong, not-so-sweet fragrance. To those who haven’t smelled paperwhite blooms, I find them reminiscent of lilacs, with a heavy, almost musky undertone*. The scent is literally heavier than air and wafts downward. After overcoming my surprise at so raw a fragrance emerging from the delicate cups, I began to enjoy it.

The blooms are irrepressibly cheery and I smile every time I pass by. I’ve got another pot forcing in the basement and I’ve ordered white hyacinths to chill and force as well. I’ll never spend another winter without forced blooms brightening up our home. The pleasure they bring is worth the pain of forcefully inducing the bulbs to bloom out of season.

*In fact, paperwhites belong to the “heavy group” of fragrance, which includes blooms such as lilies, jasmine, and tuberose. The “heavy” component of the scent is due to the presence of a chemical called indole. Indole in its purest form smells like rotting meat. (Indole contributes heavily to the scent of skunk cabbage.) In small doses, and combined with floral notes, indole gives perfumes a seductive aroma. Some people find indole notes offensive, but I adore indole-laced perfumes, such as Michael, by Michael Kors.


More on paperwhite scent

Wednesday, November 23, 2005

Online Thrift Store

I’m a garage sale junkie. I love spending my Saturday mornings combing the nearby neighborhoods for treasures. Sadly, with winter on the way, the sales are slacking off. My second-hand shopping opportunities are now limited to thrift stores and the internet.

Although I always intend to shop thrift stores, I seldom go. I hate the drive (especially through the dreary winter landscape) and I don’t like rubbing shoulders with my fellow second-hand shoppers. (I admit, the last bit sounds snobbish.)

I’ve had mixed success second-hand shopping on the internet. Ebay has become overpriced. I visit Craigslist often, but it isn’t as active in Cincinnati as it is in other locations (like Chicago). I avidly read our online bulletin board at work, but seldom find anything to purchase.

Yesterday, spurred by a reference in a fellow Cincinnatian’s blog, I discovered an online site that combines the best of thrift stores (cheap and unusual wares) and on-line shopping (convenience). At the risk of generating more competition for the items I bid on, I will be gracious enough to share it: www.shopgoodwill.com. Like ebay, it is auction based and there are shipping prices to pay. However, the prices start and end much lower. Only the best of Goodwill’s donations end up on the site. Evidently, some of them must be quite valuable. For example, there is a vase up for auction that has reached over $700 in bids. Most items go for much less. For anyone interested in antiques, period pieces, shabby chic, and kitsch, this site is mecca.

(Brit - you HAVE to check out the textiles!)

Tuesday, November 22, 2005

Growing as a Gardener

The gardening books said this would happen. I thought that I’d be forever fascinated with only non-woody perennials, but I’m becoming more and more interested in trees and shrubs. It started with a sweet bay magnolia, then a butterfly bush, and then a weigela. I may have planted 300 perennials this season, but I also planted 14 shrubs and 4 trees. A peek at my wish list will show you that I have designs on planting even more.

I’ve been disappointed in the amount of coverage trees and shrubs get in most gardening books. Last night, though, I read a great shrub and tree book: Continuous color: a month-by-month guide to shrubs and small trees for the continuous bloom garden, by Pam Duthie. Although it doesn’t cover my current coveted item, Laburnum (which is probably too big to fit into the “small tree” category), the book is a fairly exhaustive list of trees and shrubs to add to your landscaping. The absolute best part of this book, though, was the photos of THE WHOLE PLANT. Most websites (particularly those that are trying to sell you something) only show close-ups of the pretty flowers or variegated leaves. Those pictures, while nice, give you no idea of the overall effect the plant will have in your landscape. I recommend Pam Duthie’s book as one to add to your collection for the photos alone, not to mention the sheer number of trees and shrubs addressed. I’ll be purchasing one for myself after I return my copy to the library.

I am still not a fully evolved gardener. Once I had finished lingering over the blooming and scented shrubs and trees that fill the first part of the book, I quickly flipped through the conifers and other trees and shrubs recommended for their foliage. My focus is still on flowers and scent. However, I predict that if I continue to “develop,” I’ll be adding hemlocks and boxwood to my wish list next.

Friday, November 18, 2005

It Isn't Easy Being Green

What I hate about winter, even more than the cold, is the darkness. It’s dark when I leave for work and it is dark when I return. All day long, sunbeams flirt through the window near my cubicle, filling me with restless energy. By the time I’m released from my corporate chains, though, the disk is slipping over the horizon.

Because I only see my home in the dark, I didn’t even notice the destruction that Wednesday night’s below-freezing temperatures had wreaked on my garden. Last night, with the aid of a clear sky’s twilight, I surveilled the damage. The hydrangea that was still green and thirsty this weekend is now a black lump. My gaillardia blooms have frozen in place. Even the vigorous coreopsis foliage has begun to sag. My plants and I have been shocked into winter.

I knew the cold and darkness would come and I made plans to keep myself busy this winter, working through projects to teach myself basic carpentry. So far, though, I haven’t made any progress. Walking home from the bus stop in the cold night air, all I want to do next is eat dinner and then plop on the couch with my blanket of cats and a book until bedtime.

I feel like a plant myself, entering dormancy without sunshine. I don’t feel alive until the weekend, when I can use the sun’s energy to run errands and work on projects. Is it possible that I have chlorophyll in my veins?

Wednesday, November 16, 2005

I'm Salivating Just Writing About It

Last night, we had the best dinner ever. It was so good that I’m still glowing today. It sounds simple – steak, potatoes, and asparagus. The genius is in the preparation of all three items and in the selection of the cut of steak. I simply must share the joy.

This meal is simple and quick to prepare. You will need a George Foreman Grill, a crock pot, and an oven.

Steak

Ingredients:
Beef Strip Steak
Salt
Pepper
Liquid Smoke

(Strip Steak is a nice fat steak cut, like you’d see in a restaurant. I get mine from the meat counter, not prepackaged.)

Heat your George Foreman Grill. Sprinkle salt, pepper, and liquid smoke on both sides of the steak. Place the steak on the grill, close the lid, and cook until the meat reaches your desired level of done-ness.

(Your steak will be delightfully firm and almost crispy on the outside. The inside will be juicy and tender.)

Potatoes

Ingredients:
Potatoes
Salt

Scrub the potatoes. Prick the skins with a fork and sprinkle with salt. Wrap in aluminum foil. Place in a crock pot. Turn to low and allow to bake ALL DAY (10 – 12 hours).

(The long, slow cook carmelizes the potato flesh. The potato will be golden brown inside, instead of white, and will taste incredible.)

Asparagus

Ingredients:
Asparagus
3 cloves of garlic
Salt
Pepper
Non-stick spray or olive oil

Heat oven to 400 degrees. Wash and trim asparagus. Peel garlic cloves and slice into thin cross-sections.

Spray a baking pan with non-stick spray or coat it with olive oil. Place asparagus in a single-layer row across the pan. Tuck the individual slices of garlic between the stalks. (I prefer one slice between EVERY stalk, but that may be a little much for most folks.) Sprinkle with salt and pepper. Spray with non-stick spray or drizzle with olive oil.

Bake for 20 minutes.

(The tips of the asparagus will be almost crunchy. This is a good thing. We eat the stalks with our fingers. Yum!)

Wednesday, November 09, 2005

Hens in a Stump

The word has gotten round my workplace that I am a gardening nut. Last week, one of my former coworkers (she was transferred to another department) brought me a bag full of Sempervivum (Hens and Chicks). As she handed them to me, she insisted that they could only be grown in a strawberry pot and seemed concerned that I didn’t have one. At the last moment, I thought she might take the bag back, but she let me have it after dire warnings about overwatering and planting in ordinary pots.

Honestly, I have nothing against strawberry pots, but her dogmatic attitude inflamed my obstinate streak. I decided not to buy a strawberry pot just to be contrary. Instead, I planted the hens in my upturned stump.

The stump isn’t yet rotted enough to provide niches for the roots, so I helped it along with my cordless drill and a ¾” Irwin Speedbor drill bit. I drilled the holes (wiggling the drill a bit to get a larger hole) and inserted the umbilicus of each little hen. I didn’t add soil or water, but I probably should.

I’m not sure if these will survive living in the stump. It could be to dry, cold, or shady. If they do establish and multiply, however, my stump will be simply charming. I’ll keep y’all updated. Maybe I’ll start a new trend of growing Hens and Chicks in pieces of old wood instead of in the current moss wreaths.

Tuesday, November 08, 2005

100 Crocuses

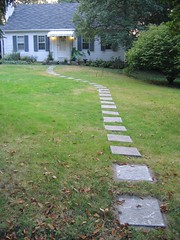
On Sunday morning, I planted 100 crocuses along my stepping stone walk. To non-gardeners 100 sounds like a lot of bulbs, but the gardeners know that it’s only a start. I’ll admit, even though I think I’m a gardener, I was a bit daunted by the thought of digging 100 individual holes (no bouquet-planting in this location) but it was SO EASY and FAST.

First, I dumped my two packages of bulbs into a plastic tub. Then, I strolled down my walk, scattering bulbs to achieve that “natural” look. Eventually, the walk will be contained within only a 3-foot swath of grass, so the bulbs had to land within the future path width. Of course, I ran out of bulbs before I reached the end, so I had to redistribute a few to get an even effect.

Scattering bulbs was fun for both me and the kitties, but I anticipated that the digging would be a chore. When I bought the bulbs (at White Oak Garden Center), I also purchased my 3rd trowel of the season. The previous two trowels were pieces of crap. They both bent the moment I plunged them into the soil and pried at the gummy clay. I examined a $9.99 Bono trowel at the garden center and then asked a member of the staff about its sturdiness. I was assured that it was the finest trowel the garden center carried. Seeing that I was also purchasing bulbs, a bulb-planter was recommended, but I’ve heard too many bad reviews of those devices to even bother trying. I purchased the fancy trowel and hoped for the best.

If I could marry that trowel, I might. It performed fabulously. I crawled across the lawn and dug 100 holes in record time. As I located each bulb (not an easy feat in our long grass), I put it out of harm’s way, dug two sides of a hole, pried the plug up, popped the bulb in, and tamped the turf back into place. The trowel didn’t even threaten to bend. It was $9.99 well spent.

Planting 100 bulbs into individual holes was much more pleasant than I expected. Now I just need to motivate myself to sink the remaining 26 of the 28 stepping stones so that we can mow the lawn next summer. But even with long grass, won't this path be an absolute vision in the spring?

Monday, November 07, 2005

Wish List

I’ve posted my plant “wish list” for next year (in the sidebar) and it is already out of date. This is actually the second version of the list. I greedily purchased every item on the last list before I managed to post it. Now, looking at the current list, I need to remove the Summersweet (Clethra). I bought three at 50% off this weekend.

Even though inaccurate, the list helps me craft future plans for the garden. I add both items that will fit in with certain garden themes and plants that simply strike my fancy. I have enough blank space to create new beds around the odd plants that don’t fit anywhere else.

If you have a plant favorite that you think should be on my list, let me know! The more, the merrier.

Saturday, November 05, 2005

Poppies DO Have Fall Foliage

I nearly pulled my newly planted Oriental Poppy out of the ground this morning. I had the unfamiliar, but weedy-looking, leaves gathered neatly in my hand and was just about to give it a good yank when I realized that I had planted a bare-root poppy here only a few weeks ago. I checked the locations of the other two roots and found similar leaves emerging.

These are my first poppies. I remember reading that they die back during the summer and re-emerge in the fall, but I didn't expect growth on my just planted bare roots. I suppose this is a sign that my roots were received in good condition.

I'm still a little rattled from the near miss, though. Maybe I should stick my tags in the ground after all.

Farming Again

Do you remember my reservations about using straw in my newest lasagna bed? So far, one of my fears have been realized.

Today, as I layered leaves over the bed, I noticed green, grass-like blades emerging from the straw. At first, I thought my dutch iris had sprouted. Then, I thought some of the original grass had forced its way through the newspaper. Upon closer inspection, I realized that the seeds that had been present in the pine straw had germinated. I'm growing a crop of grain in the front yard.

There is a silver lining to all of this: the grain weeds are sure to die over the winter. Had the seeds germinated in the spring, I would have had to pull them. Just one more reason to love a good, hard frost.

Thursday, November 03, 2005

A Poor Excuse for a Post

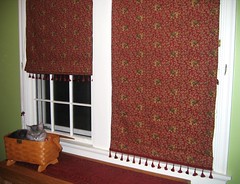
I made roman shades for my dining room last February. I was quite pleased with myself, but thought the shades needed a little more “oomph.” Over the course of the past two evenings, I tacked fringe onto the bottom. Now they are complete.

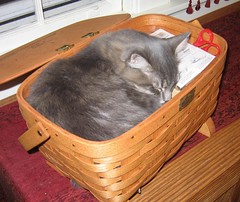
(This project is so minor that it doesn’t really even warrant a posting. I just wanted to show everyone how cute Mr. Tibbs is when sleeping in my sewing basket!)

Wednesday, November 02, 2005

See My Big Bush

We’ve been in our house over a year and the identities of a few of the pre-existing plants are still unknown. This shrub was one of the mysteries until cool Fall temperatures caused it to reveal its true colors. I think I can now confidently say that this is a burning bush, Euonymus alata. If so, it is the biggest burning bush I’ve seen in the city. I don’t think I’ve seen another specimen more than four feet high and wide. I’m not sure if my shrub is larger than the others because of its age (unknown, but assumed to be great) or the greater popularity of dwarf variety, 'Compacta.' I don’t mind its size; there is more to love! I spent the spring and summer thinking that this was a boring shrub, but I can’t stop looking at it now.

(Have you noticed yet that I am wearing the same clothes in almost all of my pictures? I have no excuse. I love my gardening grubbies!)